安裝 XAMPP
你的個人電腦裝上 XAMPP 就可以變成網站伺服器,再下載網路上的架站軟體,你的電腦就可以提供各種服務,而且這些軟體很多是免費的。
下載
以下示範版本 5.5.24 和 5.6.8
安裝
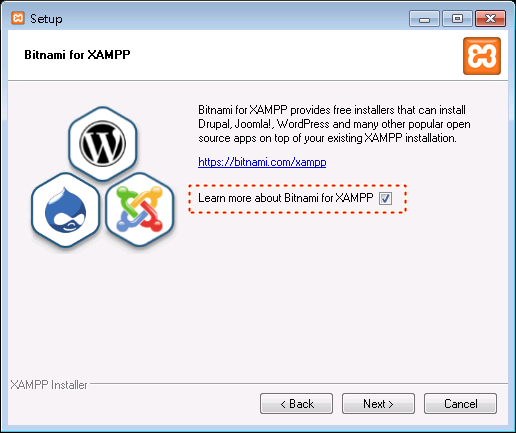
Learn more about Bitnami for XAMPP 可以不用勾選
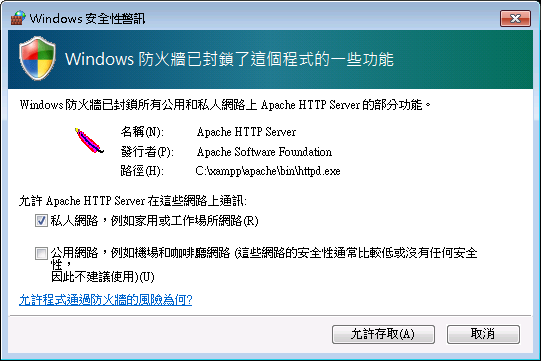
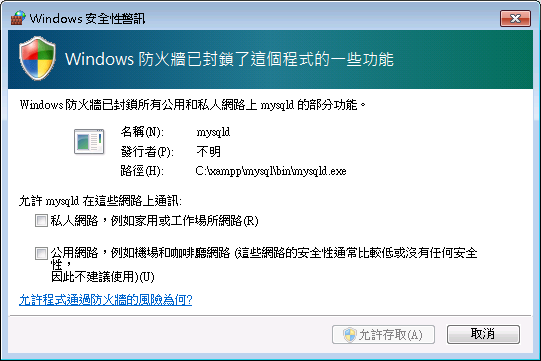
開放防火牆
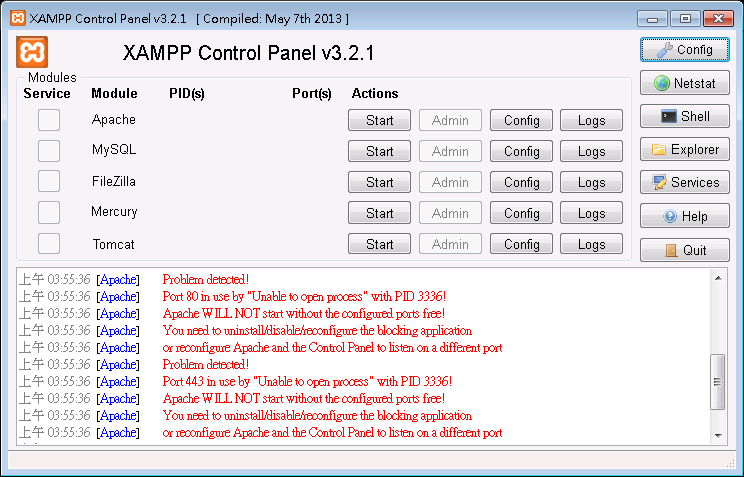
安裝完成,啟動XAMPP控制台
修改 Apache->Config->httpd-ssl.conf
 找到
找到 ServerName www.example.com:443改成
ServerName localhost:443啟動Windoes工作管理員,結束httpd.exe,回到 XAMPP Control Panel, Apache->Start
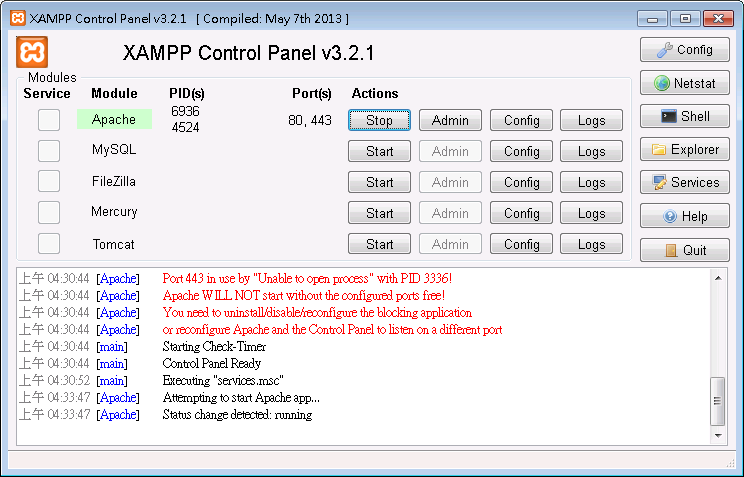
XAMPP Control Panel, MySQL->Start
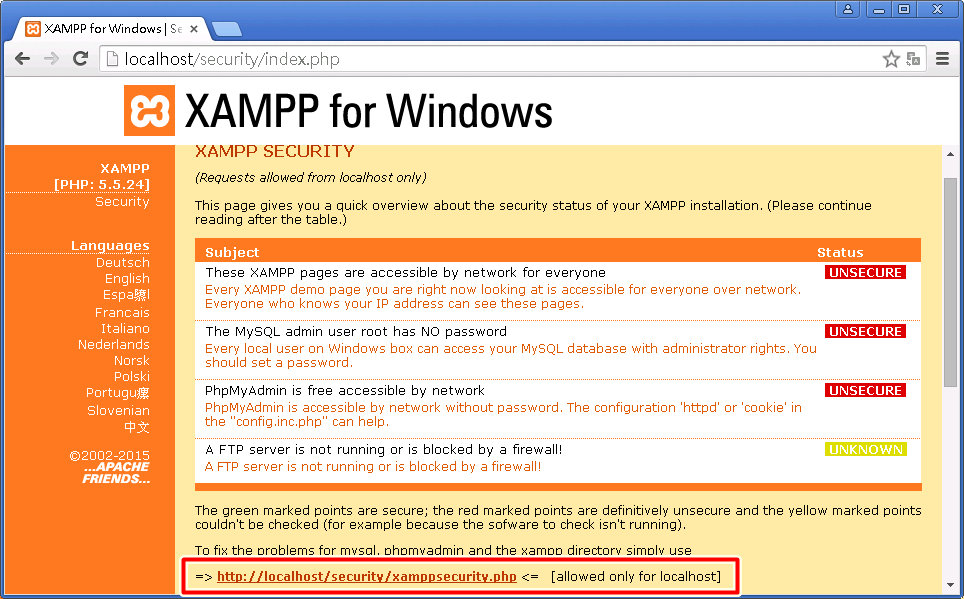
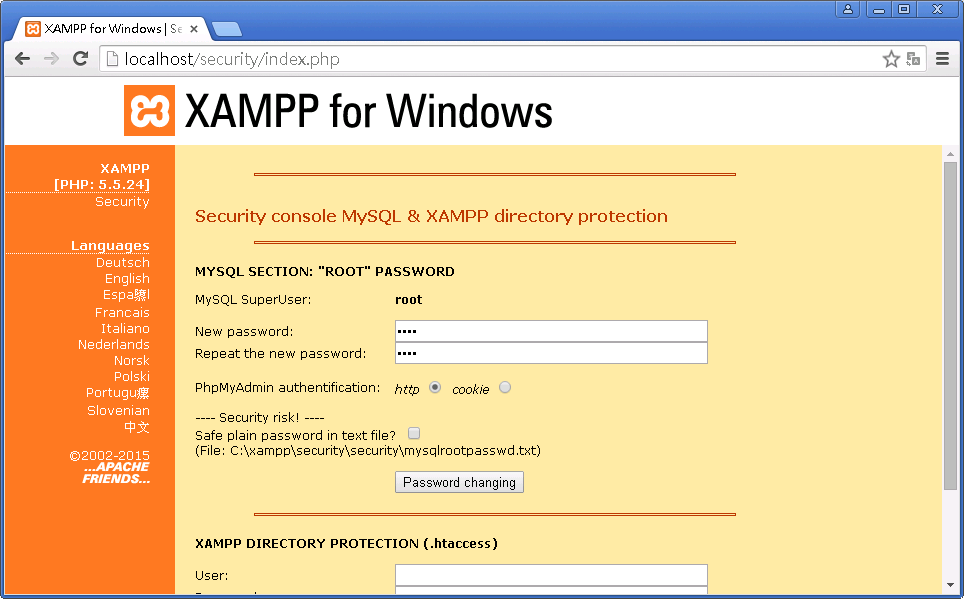
XAMPP Control Panel, Apache->Admin 開啟網頁,建議點選英文版本。 開啟網頁上 Security, 點選 [allowed only for localhost] 那行的連結,修改 MySQL 密碼
php.ini
short_open_tag=Off
error_reporting=E_ALL & ~E_DEPRECATED & ~E_STRICT
date.timezone=Europe/Berlin
max_execution_time=30
max_input_time=60
memory_limit=128M
post_max_size=8M
upload_max_filesize=2M
改成
short_open_tag=On
error_reporting=E_ALL & ~E_NOTICE
date.timezone=Asia/Taipei
max_execution_time=300
max_input_time=300
memory_limit=300M
post_max_size=200M
upload_max_filesize=200M
進階設定
- 開啟 XDebug,修改 php.ini
改為[XDebug] ;zend_extension = "C:\xampp\php\ext\php_xdebug.dll" ;xdebug.profiler_append = 0 ;xdebug.profiler_enable = 1 ;xdebug.profiler_enable_trigger = 0 ;xdebug.profiler_output_dir = "C:\xampp\tmp" ;xdebug.profiler_output_name = "cachegrind.out.%t-%s" ;xdebug.remote_enable = 0 ;xdebug.remote_handler = "dbgp" ;xdebug.remote_host = "127.0.0.1" ;xdebug.trace_output_dir = "C:\xampp\tmp"[XDebug] zend_extension = "C:\xampp\php\ext\php_xdebug.dll" ;xdebug.profiler_append = 0 ;xdebug.profiler_enable = 1 ;xdebug.profiler_enable_trigger = 0 ;xdebug.profiler_output_dir = "C:\xampp\tmp" ;xdebug.profiler_output_name = "cachegrind.out.%t-%s" xdebug.remote_enable = 1 xdebug.remote_handler = "dbgp" xdebug.remote_host = "127.0.0.1" xdebug.trace_output_dir = "C:\xampp\tmp"